Friday, 26 November 2010

Free template - Christmas favour/gift boxes

CLICK ON IMAGES FOR A CLOSER VIEW

Favour boxes are increasing in popularity and are a great alternative to Christmas crackers on the festive table.
Unlike crackers, you have complete freedom to choose the contents - anything from small gifts to mints, chocolates or sweets.
I have designed a small tapered box here and there are free templates at the end of this post.
I've included a template for the flower too.


I first saw this flower on Sarita's blog: Little Princess Cards.
Her work is stunning so allow yourself plenty of time to enjoy it!
There is a superb tutorial for this flower here:
Creations with Christina - yet another hugely talented artist.
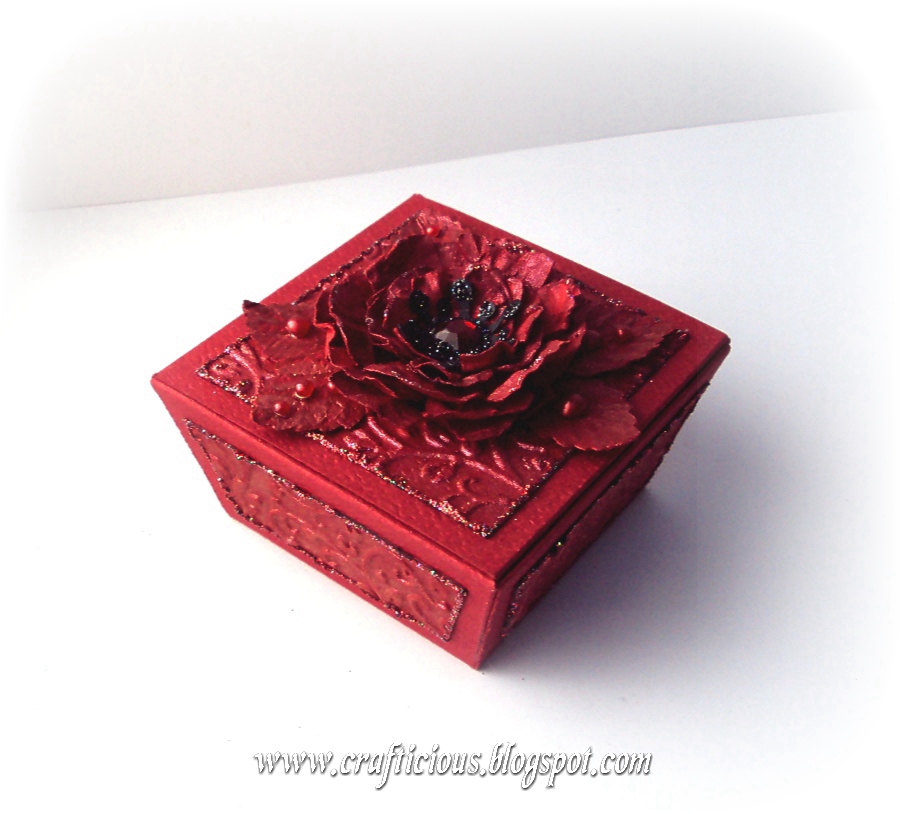

I used Craft Concepts embossing folder 'Budding Vine' for the textured panels on all of these boxes.
Misted here using Cosmic Shimmer 'Lava Red'.


The leaves were made using X Cut Embossing punch 'Beech Leaf'


 Here I used Cosmic Shimmer 'Peacock Green' to add depth to the embossed panels.


 The flower centre was made using Martha Stewart 'Snowflake' punch.
Punched out in black and glittered with black holographic glitter.


On this box I dabbed lightly over the embossing using a VersaMark ink pad,
then brushed Perfect Pearls 'Heirloom Gold' across the surface.


The flower is misted with Cosmic Shimmer 'Purple Violet'.
 I didn't have a dark gemstone so used a lilac gem and tinted it darker using a purple Promarker.


To make the box:
1) Glue flaps 1 & 2 to the inside front
2) Glue flaps 3 & 4 to the inside sides
3) Fold the front flap in and glue in position
This strengthens the front of the box
and locks flaps '1 & 2' in position.

The made box measurements are:
Top - 68mm square (just over 2.5 inches)
Base - 55mm square (just over 2 inches)
Hieght - 33mm (just over 1.25 inches)
and it only requires one full UK A4 sheet of card


Favour Box download sheet.
Click on the image and open it fully before saving


Grunge flower download sheet.
Click on the image and open it fully before saving

Oh this has taken me so long to post...
I'm not sure which is slower - my 'old' computer or my 'young' BT Internet connection!
I have cobwebs on my iced-up fingers!!!

Keep warm......

 X

Wednesday, 10 November 2010

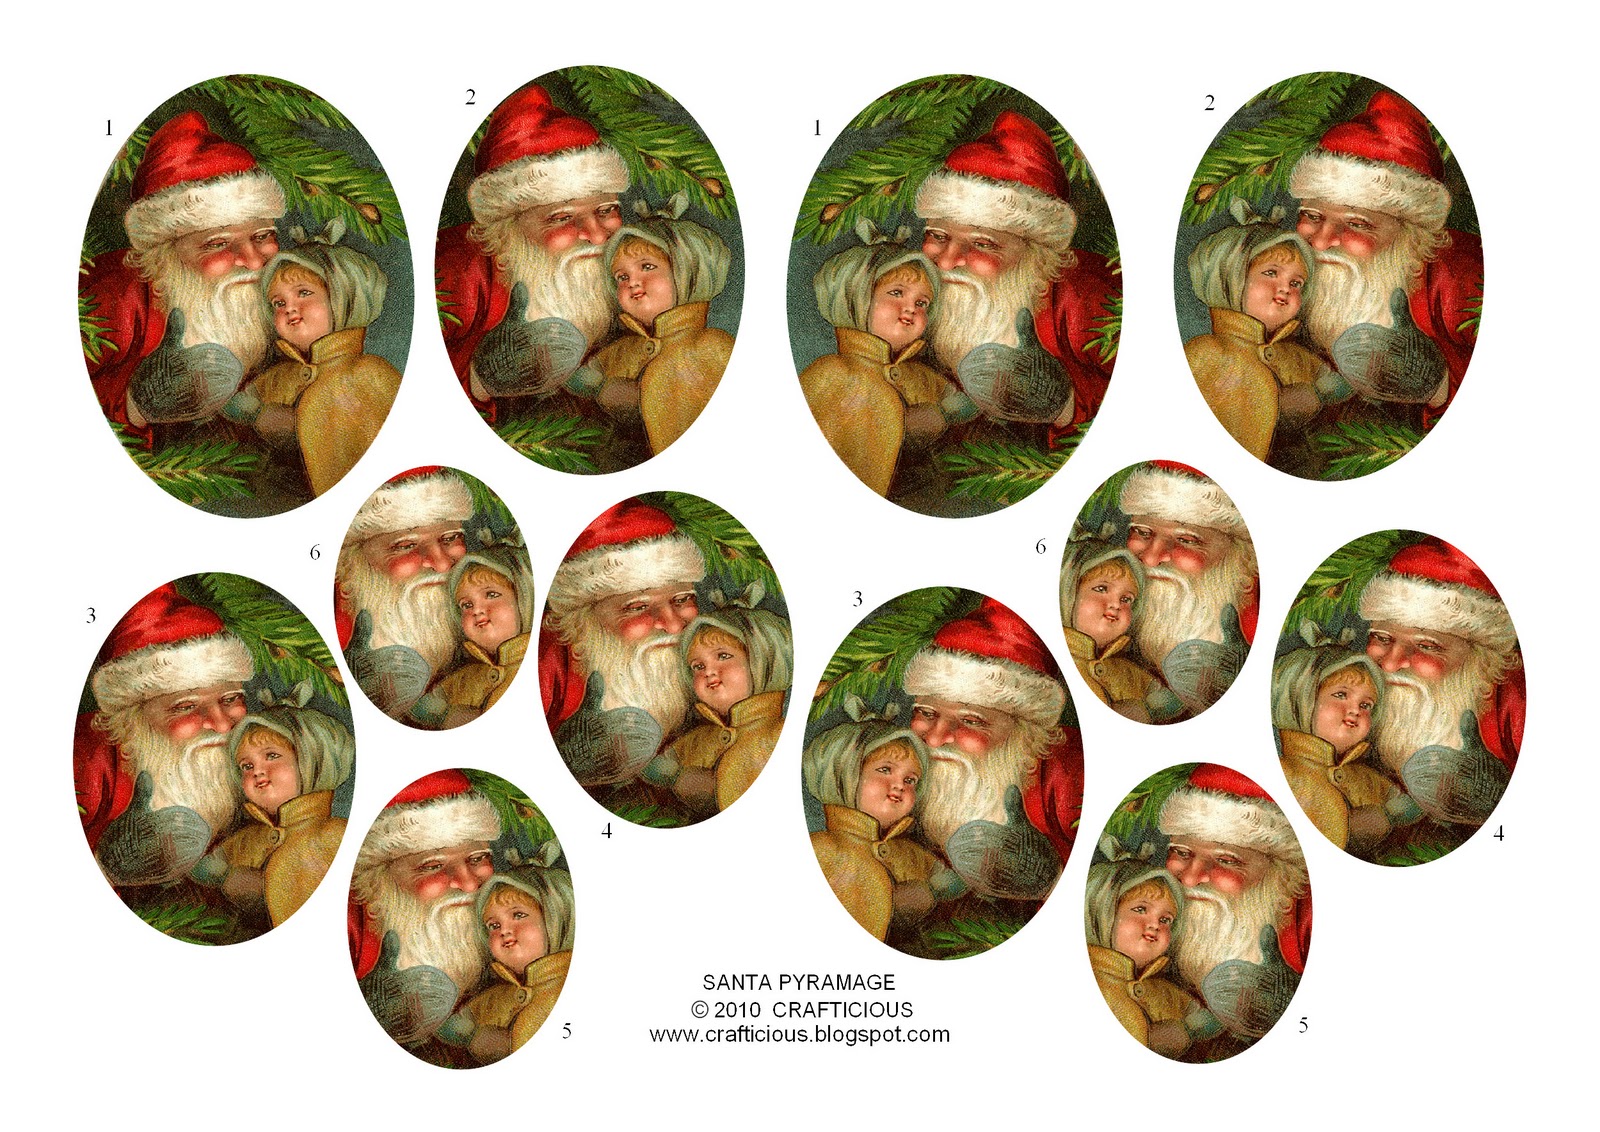
Free Christmas Pyramage - 'Santa Hugs'


Here's my Christmas pyramage and backing papers.
There are free downloads at the end of this post.
I have only used three layers of the pyramage here: 2, 4 and 6.
You'll find they're all numbered on the sheet.
Each image allows up to six layers.


Before assembling the layers I inked lightly round the edges
using Distress Ink 'Chipped Sapphire'.
It's my new black!
I attached acetate over the back of the card aperture
then fixed the pyramage onto it.


The sentiments are from Inkadinkado clear stamps set,
'Cool Christmas'


Download Sheets
Click on the images to open them fully
before saving.
These are large images to ensure a good print quality.

'Santa Hugs' Pyramage sheet


Christmas Backing Papers


Thanks for popping by
X


Saturday, 30 October 2010

Halloween Tags - 'Trick or Treat'


Trick or Treat?


These are my Halloween 'trick or treat' tags.
There are some free downloads at the end of this post.

The Tags:

I printed the tags,
cut them out,
then sponged them with distress inks.
Simple washing-up sponges - cut into small sections - are just as effective as 'craft sponges'


The inks I used were Rangers Distress inks;
1) crushed olive
2) rusty hinge
3) barn door
4) chipped sapphire

To finish;
I mounted each tag onto a 37mm x 70mm piece of black card,
trimmed the corners and punched the hole.
I cut thin strips from the plastic used to make the bags 
and threaded one through each tag.
The letters are highlighted with black holographic glitter.

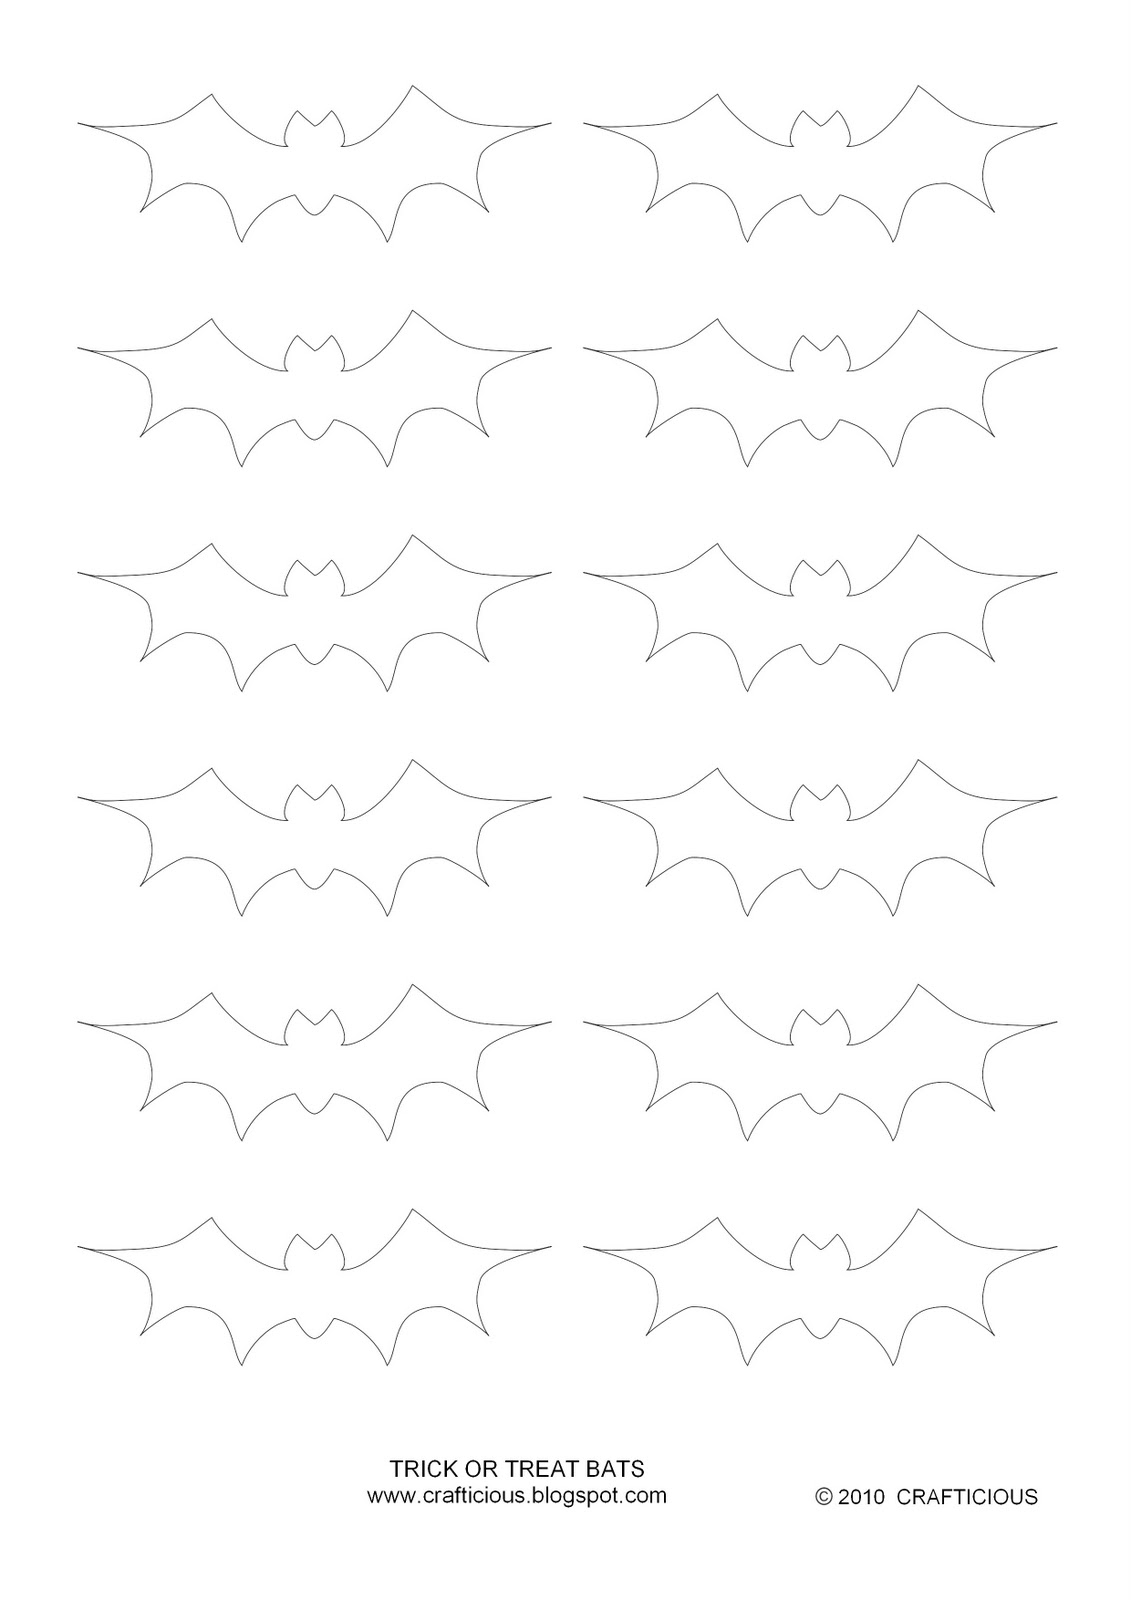
The bats:

1) I printed the bat onto white cartridge paper, cut out and
traced onto black card, then cut out.
2) Scored down the wings
3) Folded along the score lines to dimension the bat wings.

The eyes:

Print then apply a light coat of gloss/varnish to each eye.
Allow to dry and cut out.

Shaping the eyes:
You will need a half-spoon and a quarter-spoon measuring scoop.

1) Place the 'eye' (print-side down) into the half-spoon measure.
2) Gently press the quarter-spoon measure into this.
3) Tip the 'eye' out, onto an embossing mat,
gently work the back of the quarter-spoon, in a circular motion,
across the reverse of the 'eye'.

I attached the bats and eyes using paper springs - made from strips of red paper.

 
The bags:

The treat bags are made from 350mm squares of  black and orange carrier bags.
I cut the edges in a zig-zag pattern.


Filled with a small selection of sweets
and a Halloween joke.

Here's the link for the jokes and lots of fab Halloween stuff:
I printed the jokes onto coloured paper and cut into strips.


 Download Sheets
 Click on images
and make sure they are full size before you save.

'Trick or Treat Eyeball Tags'

'Trick or Treat Tags'

 'Trick or Treat Bats'

Thanks for visiting and hope you have a Happy Halloween!
X

Thursday, 21 October 2010

Halloween Card - 'Skull-duggery'

 Using the tent fold in my earlier tutorial 'tent fold card'
I introduced an aperture for the eyeballs.
The skull is a free download from this fantastic graphics website :
papercrave
it has lots of other lovelies too!
 I printed the skull, cut out and traced onto ivory opalescent card.
I traced and cut it out twice so it could be layered onto my card.
The edges are inked with MEMENTO Bahama Blue ink.
The eyes and bone are from my free download 'Eyes & Bones'
I attached each eye to a strip of acetate
and glued it to the inside front fold.
I love the way the eyes bob about when the card opens.

The cobweb stamps are Basic Grey - 'Eerie Collection'
Stamped using VersMark and embossed with silver pearl.

More Halloween, with links, soon!!!!

X

Wednesday, 20 October 2010

Halloween - 'Eyes & Bones' free download

Click on the image, make sure it is fully open, then save.
This is a full A4 sheet.
I do so love Halloween!

I'll be loading my card (and some fantastic Halloween links) very, very soon.

Have fun!
X

Saturday, 16 October 2010

Tent fold card - 'Poppy'

Here's a variation on the tent fold card.
Mum wanted something a little different for her craft classes and I'd seen this fold on QVC.
The featured cards were gorgeous but they required a very large sheet of basic card stock.
I wanted to use standard A4 card and here's what I came up with:
A 120mm square card using two (UK) A4 sheets. 
There's a tutorial at the end of this post.

I made the flower using the Woodware Dahlia flower punch
and the flower centre - Woodware blink blink punch.

The stamped background 'SU - Baroque Motifs' stamps, embossed with fine detail gold.
Sentiments 'Big sentiments by Paula Pascual' embossed with fine detail gold.


Tutorial
You will need two A4 sheets of card

1) From the first
cut a strip measuring 297mm (length of A4) x 120mm


2) Score A4 half fold (line 7 on the Eazi-Score board) in the centre
             and 25mm in ('box line 2' on the Eazi-Score board) from either end.
Eazi-Score board- Diamond Card Craft


3) fold into a 'tent' as shown above.

 
 4) From the second A4 sheet
cut a strip across the width (210mm) x 120mm high


 5) score the centre - A5 half fold (line 6 on the Eazi Score board)
and A5 gate fold (line 3 on the score board) either end


 6) Fold a s shown above


7) Attach the card to the piece you have just made.
flap (1) is attached under the base
flap (2) is attached on top


Hope you have a go - I think I'll be playing with this fold a little more.
Perhaps an aperture would be fun?


Thanks for popping by and I'll be back soon - promise!
X