Thursday, 6 January 2011

Pop Up Exploding Cube Card Tutorial

CLICK ON IMAGES FOR A CLOSER VIEW

This card folds completely flat and fits inside a half A4 envelope.
There are two sheets to download at the end of this post.
The first is a template for the pop up cube base.
The second is a positioning & cutting guide
for an A5 acetate sheet.

To make this card you will need:
one A4 sheet of card for the cube base
one A5 sheet of acetate for the centre pop and acetate strips
(Strong acetate is needed for this project I buy mine from
Joanna Sheen or use recycled packaging where possible).
one A4 sheet of paper for the positioning & cutout guide
Numbers, stars & sentiments tag from the download in my previous post
Hole punch, jump ring, glue, scissors, sticky tape, craft knife,
metal rule and cutting mat.


Print the first download sheet (at the end of this post)
onto an A4 sheet of card.
After cutting out you will have 11 pieces as shown above.


1) Piece A - score along the dotted lines and fold into a cube.
2) Piece B - score along the dotted line, fold and glue inside the open corner of  A to lock the cube together. 


3) Score and fold piece C as shown above.
4) Glue into position in the centre of the cube
as shown in the diagram.


Print download sheet two, at the end of this post,
onto an A4 sheet of paper.
This is a positioning and cutting guide for the centre pop up.
Position an A5 sheet of acetate over the top of the guide.
Cut out the numbers (from the download sheet in my previous post) and glue them onto the acetate,
following the printed guide which shows clearly through the acetate.
Cut out along the red lines.
The base of your acetate cut-out has a slit forming two flaps A & B
Glue flap A onto the front of the centre strip (piece C) in your cube
and flap B onto the back of your centre strip (piece C).
The centre strip is visible in the image below - number (3)


Here's a photograph looking down on the cube card.
Cut out the stars you want to use in the explosion and glue each one onto a strip of acetate about 5mm wide
and no longer than 16mm.
These can be attached to the inside front, back & sides of the cube.
Vary the heights & angles to make the explosion more interesting.
When you have finished glue the inside panels D to K to the insides of the cube.
They cover and anchor your centre acetate (flaps A & B)
 and all of the acetate strip (stars) ends.
(1) in the above image shows the acetate fixings uncovered
(2) shows after a panel has been glued to the inside cube.


note: before you finally anchor the acetate 'star' strips
close the cube card to check they don't over-run the envelope dimensions.

The sentiments tag is attached to the cut out centre of the zero
using a jump ring,
There are hole punch guides marked out for you.

Download Sheet One - Pop Up Cube
click on image to open fully before saving

Download Sheet Two -
Acetate Positioning & Cut Out Guide
click on image to open fully before saving
I'll be developing this idea over the next few weeks
so there will be more projects to come.


I know it doesn't look it but this is a very simple pop up.
I hope I haven't made the instructions too complicated.
X


Friday, 31 December 2010

Exploding Cube Card - Happy New Year!

CLICK ON IMAGES FOR A CLOSER VIEW

Here's the card I made from the download sheet in my previous post.
I will load a tutorial in my next post.


It folds completely flat and fits a half A4 envelope.


Wishing you all the very best for 2011.

HAPPY NEW YEAR!
Hugs,
X


Wednesday, 29 December 2010

New Year - Free Download & Digital Stamps

New Year Free Download Sheet
Click on image & open fully before saving

OMG! It's the 29th already!!!
I thought I'd better get these on fast.
The sheet above is with a New Year card in mind.
I'm making a sample but, as it's close to New Year, the downloads are here first.

I've sized the tag so it can be suspended
from the centre of the zero.

The next two sheets are digital stamp sets:
1) 'Numbers'
2) 'Tags'
These follow the same style but can be used all year round.
There are tags for New Year, Birthdays and Anniversaries.
I've tried to keep the outlines of the numbers simple
so they're easy to cut out and layer.

'Numbers' Free Digital Stamp Set
Click on image & open fully before saving

'Tags' Free Digital Stamp Set
Click on image & open fully before saving

I have to say I've had enough of winter and snow.
I don't mind if we have a 'Heat Wave' in January,
just a small one will do
I'm not asking for anything big.

Wishing you all a very happy and fulfilling New Year.
X

Friday, 17 December 2010

Christmas Paper Wreath & Flower Tutorial

CLICK ON IMAGES FOR A CLOSER LOOK

This wreath is made from 12 rectangles of lightweight card.
There's a tutorial on Stephanie's fab blog: Homemade Gift Ideas
The principle is that whatever size you decide to use
each rectangle needs to be twice as long as it is wide.
The fold couldn't be simpler.


I used 12 rectangles measuring 140mm (5.5") wide x 280mm (11") long
It took 12 A4 sheets to make this wreath
but it is large: 450mm (17.7") across
I recommend that you glue the pieces together
or tape them at the back- but take more time than I did
to make sure the centre circle is even!


I've included a tutorial and free template for the flowers
I stamped the leaves using See-Dees stamps 'Leaves 50052 '
stamped with VersaColor 'Evergreen', cut out and glossed.
The snowflakes were made using Martha Stewart Snowflake punch.
Punched in plumb and silver holographic card. 


The next few samples have been 'thrown together',
just to give you an idea of other options.
This one was made from 12 x 12 scrapbook paper.
The rectangles measured 4" x 8".
Twelve rectangles using 3 sheets of paper.
Finished size is: 11.5" across.


Here I only used 8 rectangles, 100mm (3.9") x 200mm (7.8").
Finished size: 250mm (9.8") across.
Another idea for decorating - simply wind decorative ribbon round.


Here I used 12 pieces of white card.
Stamped in black VersaFine using Stampin Up stamp 'Sanded'.
Decorated with a random scattering of gemstones.
Imagine decorating with sweets, masks, small presents, photographs
the list is endless.
It's a great project to do with the Kids!


Hellebore Flower Tutorial


From the template at the end of this post:
1) cut out a flower and ink the centre and petal tips.
2) I dabbed over with Adirondack Dabber 'Pearl'
3) scrunch the petals as shown in the diagram
4) smooth open and curl petals upwards & inwards,
nip the tip of each petal to give definition
5) glitter the edges of the petals and finish with
a holographic snowflake and flat backed pearl glued to the centre.


Flower Bud Tutorial

1) punch thin card using a scallop edged circle punch
and cut a five scallop section away, put this to one side
2) glue the 9 scalloped piece into a cone (overlapping one scallop)
3) cut between scallops, not completely to centre
4) fold each alternate petal back out of the way
5) roll the four remaining petals tightly in
6) roll the outer four petals tightly
7) pinch them in and over the first four


Hellebore Flower Template
Click on image & open fully before saving
This wreath can be used for so much more than Christmas -
summer party, dinner party. anniversaries, weddings, New Year
to name just a few.
It works nicely as a table centre piece too!

Wishing you all a very Happy Christmas and thank you for visiting!
Elaine x

Monday, 6 December 2010

Free template - easy gift box

CLICK ON IMAGES FOR A CLOSER VIEW

Here are three easy 'pillow' gift boxes with free templates at the end of this post.


The 'watermarked' background on the large and medium boxes are stamped using
VersMark Dazzle watermark stamp pad 'Champagne' and
Inkadinkado clear stamp set 'Bold Damask'


Sentiments are from Kaisercraft clear stamp set -
'Christmas Sentiments'.
The holly leaves were made using a punch -
Woodware 'Large Holly Leaf'.
I've also drawn one for you on 'template one'.


On the small box I traced over the word 'joy' with Art Institute glue, using the fine nozzle,
and glittered with Art Accentz 'Moss'.
The background is spritzed with Adirondack Acrylic paint 'Pearl' diluted in water.


The inside flaps need a finger hole so I used a 22mm (0.9") circle punch.
You don't have to match the size drawn on the template
but I wouldn't recommend any larger punch than the one used here.


The most difficult part to these boxes is scoring the curve accurately.
You can use the guide on the template
or the off cut from cutting your curved edges - see image below.


A fine scoring tool is helpful.
Run a tumble drier cloth over the dotted line first -
this helps the scoring tool glide nicely and it smells good too!
Always use wet glue to glue box flaps,
it's much stronger than double sided tape.

Finished box measurements are:
Small ;
78mm long (3") x 60mm high (2.4") x 20mm deep (0.8")
Medium;
98mm long (3.9") x 75mm high (2.9") x 25mm deep (0.9")
Large;
148mm long (5.8") x 110mm high (4.3") x 40mm deep (1.6")


Easy Gift Boxes (small & medium) download sheet one
Click on the image and open fully before saving
 

Easy Gift Boxes (large) download sheet two
Click on the image and open fully before saving
I'll be giving you details of the flower in my next post.


Thanks for popping by and your comments are always appreciated.
X


Friday, 26 November 2010

Free template - Christmas favour/gift boxes

CLICK ON IMAGES FOR A CLOSER VIEW

Favour boxes are increasing in popularity and are a great alternative to Christmas crackers on the festive table.
Unlike crackers, you have complete freedom to choose the contents - anything from small gifts to mints, chocolates or sweets.
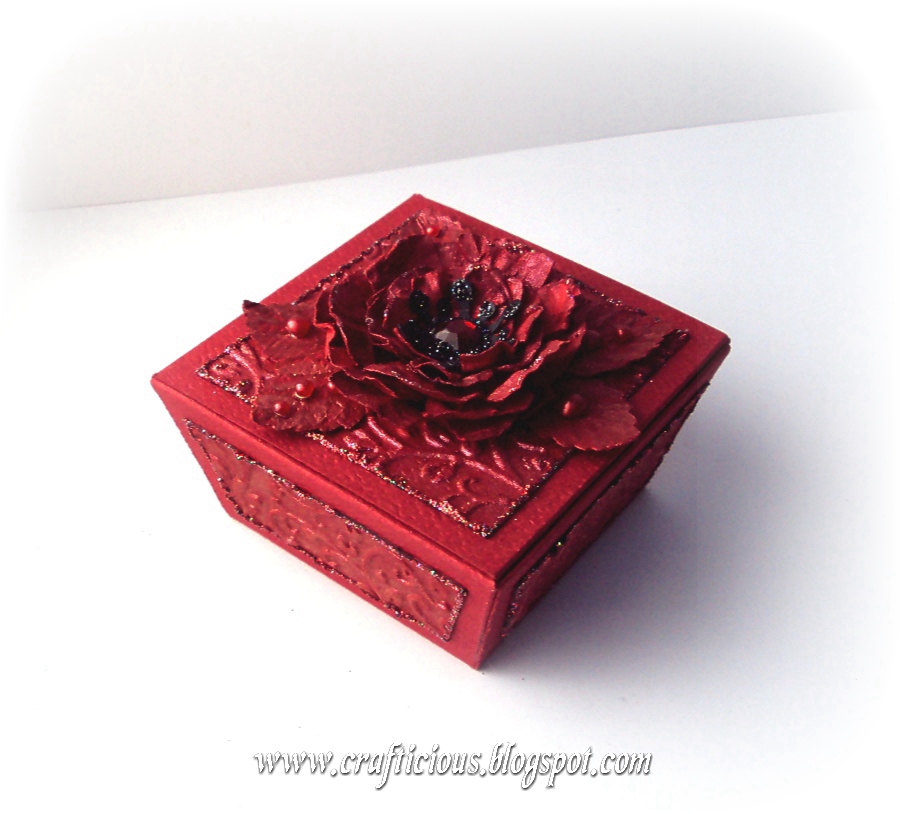
I have designed a small tapered box here and there are free templates at the end of this post.
I've included a template for the flower too.


I first saw this flower on Sarita's blog: Little Princess Cards.
Her work is stunning so allow yourself plenty of time to enjoy it!
There is a superb tutorial for this flower here:
Creations with Christina - yet another hugely talented artist.


I used Craft Concepts embossing folder 'Budding Vine' for the textured panels on all of these boxes.
Misted here using Cosmic Shimmer 'Lava Red'.


The leaves were made using X Cut Embossing punch 'Beech Leaf'


 Here I used Cosmic Shimmer 'Peacock Green' to add depth to the embossed panels.


 The flower centre was made using Martha Stewart 'Snowflake' punch.
Punched out in black and glittered with black holographic glitter.


On this box I dabbed lightly over the embossing using a VersaMark ink pad,
then brushed Perfect Pearls 'Heirloom Gold' across the surface.


The flower is misted with Cosmic Shimmer 'Purple Violet'.
 I didn't have a dark gemstone so used a lilac gem and tinted it darker using a purple Promarker.


To make the box:
1) Glue flaps 1 & 2 to the inside front
2) Glue flaps 3 & 4 to the inside sides
3) Fold the front flap in and glue in position
This strengthens the front of the box
and locks flaps '1 & 2' in position.

The made box measurements are:
Top - 68mm square (just over 2.5 inches)
Base - 55mm square (just over 2 inches)
Hieght - 33mm (just over 1.25 inches)
and it only requires one full UK A4 sheet of card


Favour Box download sheet.
Click on the image and open it fully before saving


Grunge flower download sheet.
Click on the image and open it fully before saving

Oh this has taken me so long to post...
I'm not sure which is slower - my 'old' computer or my 'young' BT Internet connection!
I have cobwebs on my iced-up fingers!!!

Keep warm......
 X

Wednesday, 10 November 2010

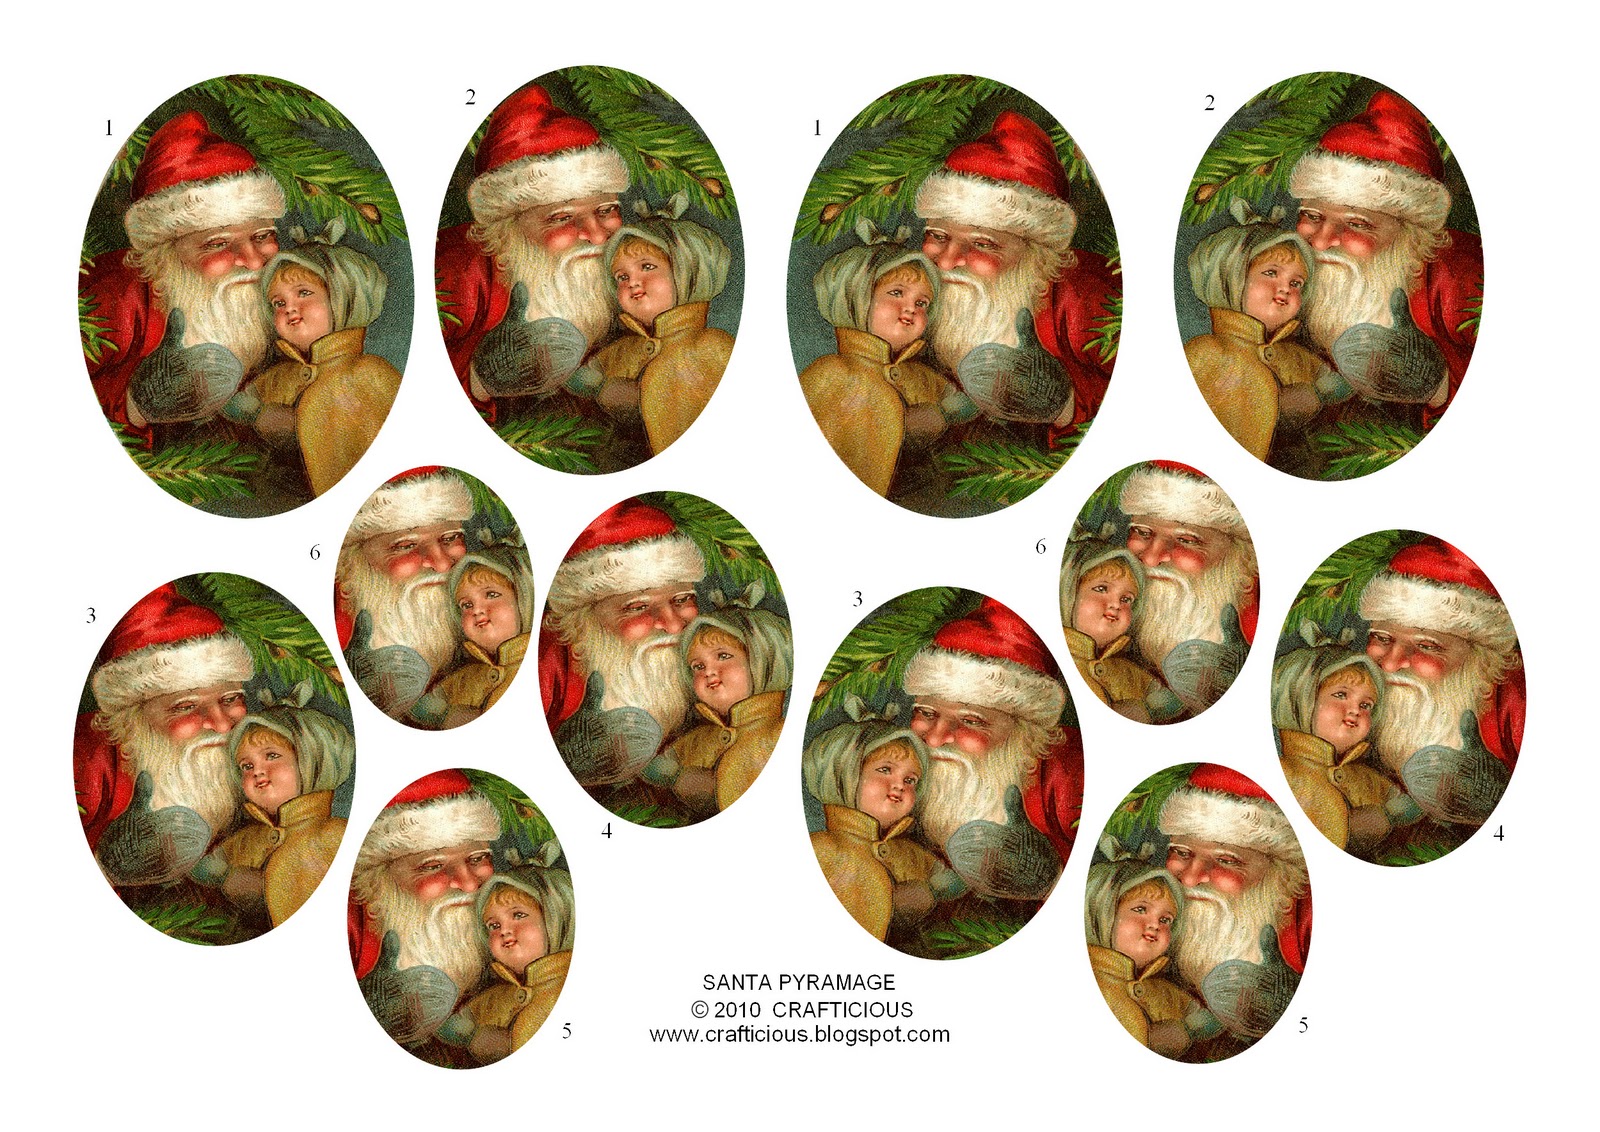
Free Christmas Pyramage - 'Santa Hugs'


Here's my Christmas pyramage and backing papers.
There are free downloads at the end of this post.
I have only used three layers of the pyramage here: 2, 4 and 6.
You'll find they're all numbered on the sheet.
Each image allows up to six layers.


Before assembling the layers I inked lightly round the edges
using Distress Ink 'Chipped Sapphire'.
It's my new black!
I attached acetate over the back of the card aperture
then fixed the pyramage onto it.


The sentiments are from Inkadinkado clear stamps set,
'Cool Christmas'


Download Sheets
Click on the images to open them fully
before saving.
These are large images to ensure a good print quality.

'Santa Hugs' Pyramage sheet


Christmas Backing Papers


Thanks for popping by
X