Sunday, 17 April 2011

Easter Card and Basket

Here's a little Easter project I've been working on.
I will be loading templates and a tutorial as soon as I can.

Unfortunately my computer is on its last legs.
It's very old and has been failing for quite some time now.
It had a major crash a few days ago and is beyond repair.
After several hours on the phone to Dell,
we managed to recover enough to chug along...
on a wing and a prayer.

Good news is - I have a new one arriving on Monday! 

CLICK ON IMAGES FOR A CLOSER VIEW
 I thought this would be a great project to do with the kids.
The dotty pattern was made by dabbing the eraser end of a pencil
onto a VersaColor ink pad 'Fresh Green'
and stamping it onto the card.

Not everyone can eat sweets
so this is an idea for an alternative.
There is a hatpin on the card and I filled the basket
with crafting goodies - three VersaColor small ink cubes
and three pots of 'Perfect Pearls'.

I'm going to try and load, at least, the templates before Monday.

I'm soooooooooo looking forward to my new computer
but very nervous about how long it will take to load everything
and get it into action.

Thank you for visiting
and I hope to be back very soon!!!!

Hugs
 X

Thursday, 7 April 2011

Pastel Tulip Cards

Here are a couple more cards I've made
using my free download sheets 'Tulips' & 'Tulip Leaves'.

CLICK ON IMAGES FOR A CLOSER VIEW
I free-hand embossed the base using my Eazi Score board.
The sentimentis are from Paula Pascual's 'Big Sentiments'
stamped using VersaColor Heliotrope.

 This is another easel card.
I'm really enjoying making them!
The sentiments are from Hero Arts
'Happiness Messages' clear stamps, stamped
using Pretty Color 'Green 7#'

The embossed background was made using
Cuttlebug embossing folder 'Floral Fantasy'.
I wish they would put the name on the folder!

Next - I'm thinking Spring, Easter and am working on an
unusual pop-up.

See you soon and thank you for visiting.
Hugs
 X

Saturday, 2 April 2011

Tag Easel Card Tutorial

CLICK ON IMAGES FOR A CLOSER VIEW


Tag Easel Card Tutorial

1) Start with a 140mm (5.5") square tent fold card

2) Cut a 140mm (5.5") square card front panel

3) Cut a tag;
a) 150mm (6") high
b) 80mm (3") wide
c) Score a line 10mm (0.5") from base
This is a valley fold.

4) Taper the top two corners of the tag.


5) Card back;
Open the card flat, outside facing you,
and cut a centred slit-
a) 10mm (0.5") down from the card centre fold.
b) and approximately 85mm (3.25") wide (slightly
wider than your tag).

6) Card front;
with the card still open-
a) score a line across the centre.
This is a mountain fold.

Close the card

7) Tag;
a) Cut a contrasting colour mount, slightly
smaller than your tag, and short enough to
avoid covering the tag score line.
Attach the mount to your tag.
b) Punch a hole centred and towards the top.

Decorate the inside of your card
before moving on to stage 8

8) Front facing you, open card.
a) Slot the top of your tag through the slit
you cut earlier (stage 5).
b) The top of the tag should line up with the
card centre fold,
c) and the tag score line with the base of your
card.

Close the card.

9) Card closed, front facing you.
a) Apply glue to the section of tag that is visible.

10) Fold up and fix to the front of your card.

11) Card front, lower half only.
Apply three strips of double sided tape or glue.
a) Make sure you cover the tag flap.
This will add extra strength to the 'pully' mechanism.

12) Attach your, 140mm (5.5") square, card front
panel, making sure you line up the top, bottom
and sides with your card.

Open the card so the tag pops into view.
Attach a tassel or ribbon.

You can easily make this card any size you like.
Just remember that the tag is always 10mm (0.5")
longer than your card height -
this being the tag section you fold up and glue
to the front of your card (9a & 10 in the above tutorial).

Many thanks for taking the time to visit.
I'll be back soon!
Hugs
 X

Thursday, 31 March 2011

Mothers Day - Tulips Easel Card

Here's a slightly different approach to the 'Easel Card'.
It works using a 'pully' mechanism.
Pull the tag and the card moves into position.

CLICK ON IMAGES FOR A CLOSER VIEW
There are free download sheets for the tulips,
leaves & sentiments tags at the end of this post.

I've used three of the larger tulips
from the 'Tulips' download sheet.
Printed onto the same lightweight card
as I used for  the matting and layering.
I attached them using 'Pinflair' dimensional glue,
love that stuff!

I've also used two large and one small leaf
from the 'Tulip Leaves' download sheet.
Printed onto green paper, cut out and texturised
in the same way as the flowers.
The sentiments on the front are stamped using 
Hero Arts 'Happiness Messages' clear stamps
and VersaFine 'Onyx Black' ink pad

'Happy mothers day' is the small, large boarder 'heart tag'
from download sheet 'Mothers Day Sentiments Tags'
Printed onto yellow card.
I layered two pieces of the same card underneath
the heart so it's slightly raised. It doesn't need anything
as thick as dimensional foam pads.

When the tassel is pulled it reveals a large tag -
a perfect spot for writing your message.
I like the fact that it has a 'secret message' feel to it.

Here's a tutorial for the flowers:
Tulip Tutorial
 1) Print the 'Tulips' sheet onto coloured card
and cut out three petals per flower.
a) The outside edges of the petals have more shape
b) the inside edges have a smooth curvature.

2) Work embossed texture lines down each petal
using a medium to fine embossing tool.
I use my embossing mat from my 'Wizard' as a work surface
(Don't worry about making your embossed lines neat & tidy).

 3) Lightly run an ink pad over the petals.
this will pick up your embossing.
You can sponge to soften the ink edges.
a) For the centre petal you only need to ink the tip.

4) Flick the edges of the petals up
as shown in the image above - this defines the inner
edges & gives the flower subtle dimension.

5) Glue the front two petals together.
a) Imagine you have pinned them at this point so... 
b) you can pivot the petals to decide how wide
c) or narrow you would like your flower.

6) Glue the third (centre) petal to the back
lining up the base so it doesn't show at the front.

7) Add 'dew drop' highlights using 'Glossy Accents'
or similar.
I found it's better to put the nozzle onto the card,
squeeze a small amount & flick off. This makes more
of a dew drop shape and less of a dot.
You can see the 'dot effect' in my previous post - last image.
It's less believable but we learn from our mistakes!


Download Sheets:

Download Sheet One - 'Tulips'
click on image & open fully before saving

Download Sheet Two - 'Tulip leaves'
click on image & open fully before saving

Download Sheet Three -
'Mothers Day Sentiments Tags'
click on image & open fully before saving

Coming next - 'Tag' Easel Card Tutorial.

Thank you for taking the time to visit, it's always appreciated.
Hugs,
 X

Saturday, 26 March 2011

Spring has sprung - Tulips!

Spring is here - YEAH!!!
I haven't deserted you.
I've been working hard on this next project.
Hope these images give you an idea of what I've been up to...


It's taken me a while.
I've been working out how to re-create these beautiful flowers,
in the quickest, easiest way possible.
Boy - simplicity can be very hard!!!


I'm almost there...
I'll be posting templates and a tutorial
in the next couple of days.


(It's a quick & easy project)
Just in time for Mothers Day.


Back to putting the finishing touches together.

Hugs,
 X
Friday, 11 February 2011

Pop Up Card - Valentine Flowers

This is the most dramatic pop-up mechanism I have
ever come across.
It's much easier than it looks and no measuring required!

I've used a DL size for my card.
( I like to make it slightly wider than standard,
 I score along the A5 half fold score  line
and it still fits easily into a DL envelope).

CLICK ON IMAGES FOR A CLOSER VIEW
 'golics' has made a video tutorial at 'instructables',
here's the link: pop up flowers 
He has tons of fabulous 3D projects.
He's very fast with his instructions so I've included
two download sheets to help:
1) Glue positioning guide
2) Flower positioning guide

The sentiment stamp (miss you) is from Paula Pascual's
'Big Sentiments' set. 

I layered two of the flowers from my
'Six Petal Flowers' download sheet.
Printed onto red lightweight card, cut out and
glittered with black holographic glitter.
The embossed background was made using:-
Craft concepts embossing folder 'Budding vine'

 'LOVE' was a free stamp from a stamping mag
(quite some time ago).
I'll find the mag and post the details -
it has to be one of my most used stamps.
I stamped onto red card using VersaMark and
embossed with 'detail gold' embossing powder.


Glue Positioning Guide
Only use a dot of glue as shown.
If you glue the whole petal the flowers
won't pop up correctly.
Guess how I know that!!!

Flower Positioning Guide


Download Sheet One
Flower Centres - Black
click on image & open fully before saving
Print this sheet twice 
onto any colour A4 lightweight card.
Cut each sheet into four equal pieces.
Follow golics instructions for folding
& cutting the flowers.
You only need seven so you'll have one spare. 

Download Sheet Two 
Six Petal Flowers
click on image & open fully before saving

These flowers and hearts are sized so they can be
pyramaged on top of each other if you prefer.

Download Sheet Three 
Hearts
click on image & open fully before saving
Happy Valentine's Day.
Hope you have fun!

Thanks for taking the time to visit my blog
 Elaine x

Friday, 4 February 2011

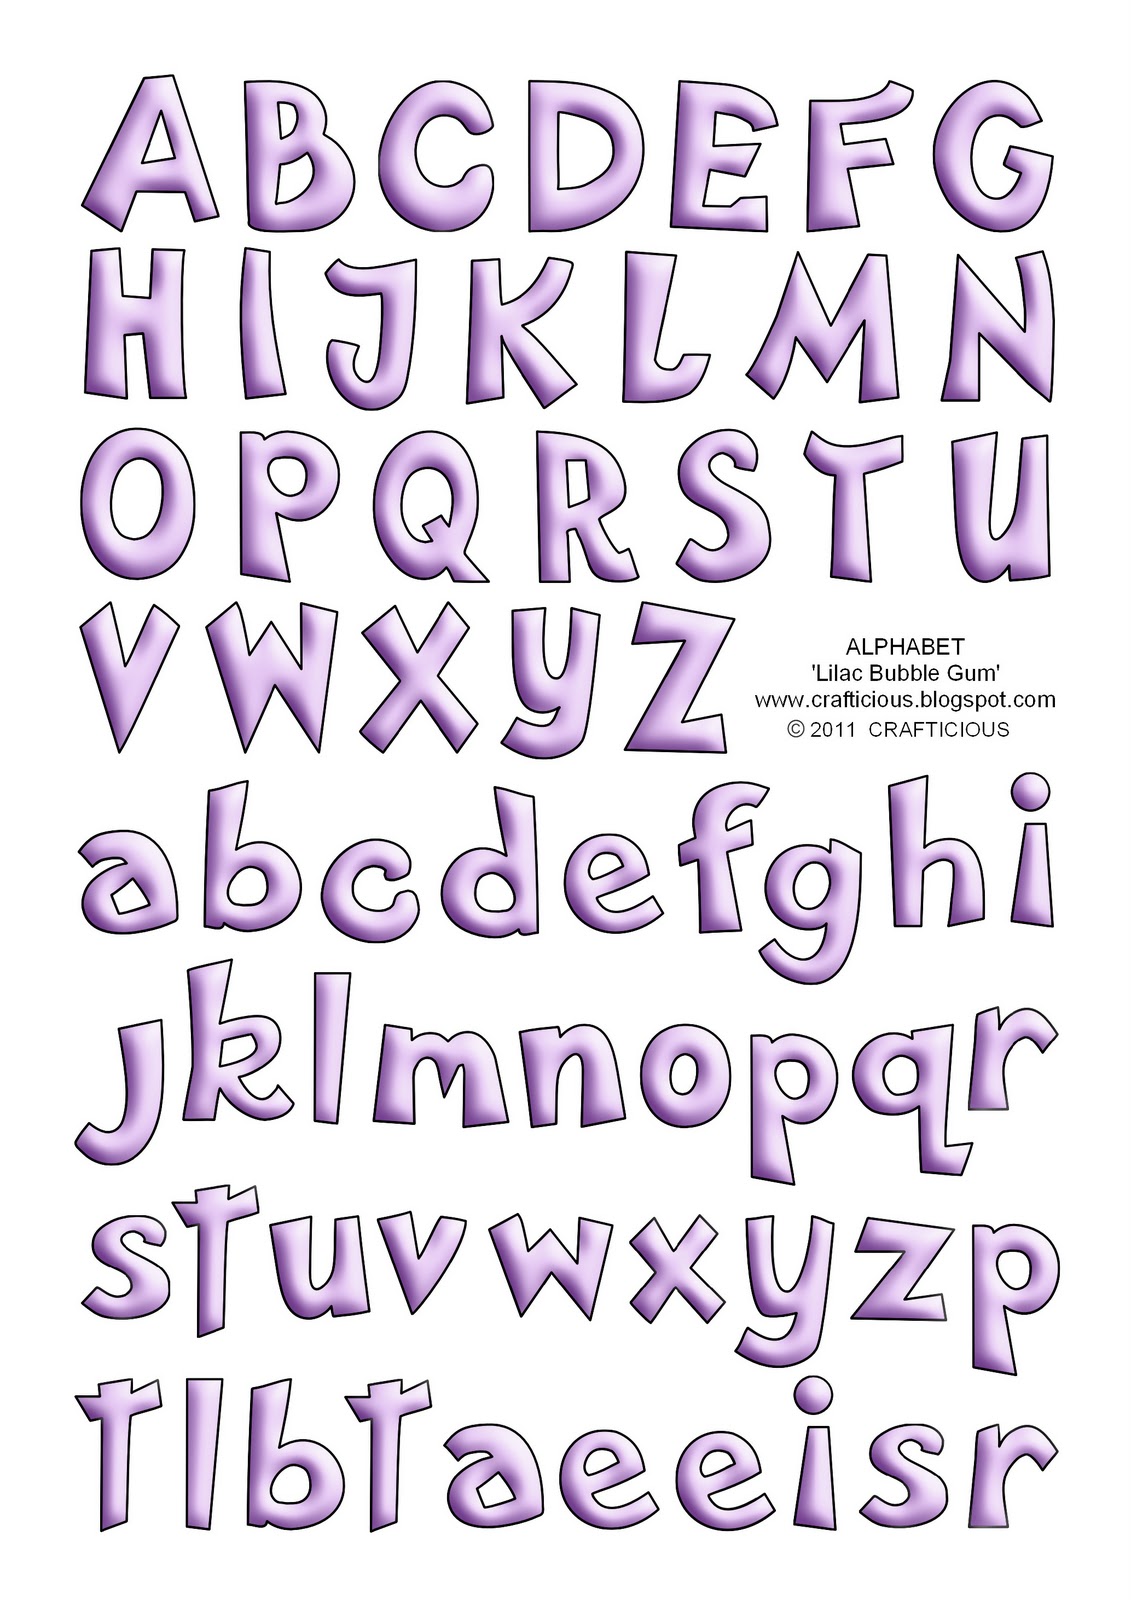
Alphabet Sheets - 'Bubble Gum' Blue & Lilac

Here's the last of my
'Butterflies & Dragonflies' decoupage set.

We still have very little, quality, light here in London 
so the image below is a bit 'rainy day'.

CLICK ON IMAGE FOR A CLOSER VIEW
  It goes without saying really - these alphabets
will allow you to make any message or name, no matter
how unusual.

I've made the outside & inside lines as simple as possible
so they're easier to cut out.

Free Download Sheet One
Alphabet - 'Bubble Gum Lilac'
click on image & open fully before saving

Free Download Sheet Two
Alphabet - 'Bubble Gum Blue'
click on image & open fully before saving
I have never been able to contain myself when I'm excited
so...

I have THE pop-up of all pop-ups coming next.
It's easy, no measuring and
the pop is unbelievable!!!

I tested it out, on several people,
and it got a WOW every time.

(OK Elaine, compose yourself)...

Just putting the final touches to the samples, downloads,
and link to a brilliant Guy who has lots to share.

Back soon and thank you for taking the time to visit my blog.
 X